
In a world where paper seems to multiply like rabbits, knowing how to scan on an iPhone can feel like discovering a hidden superpower. Imagine effortlessly turning that stack of documents into digital files with just a few taps. No more clutter and no more frantic searches for that one elusive piece of paper.
Understanding Scanning on iPhone
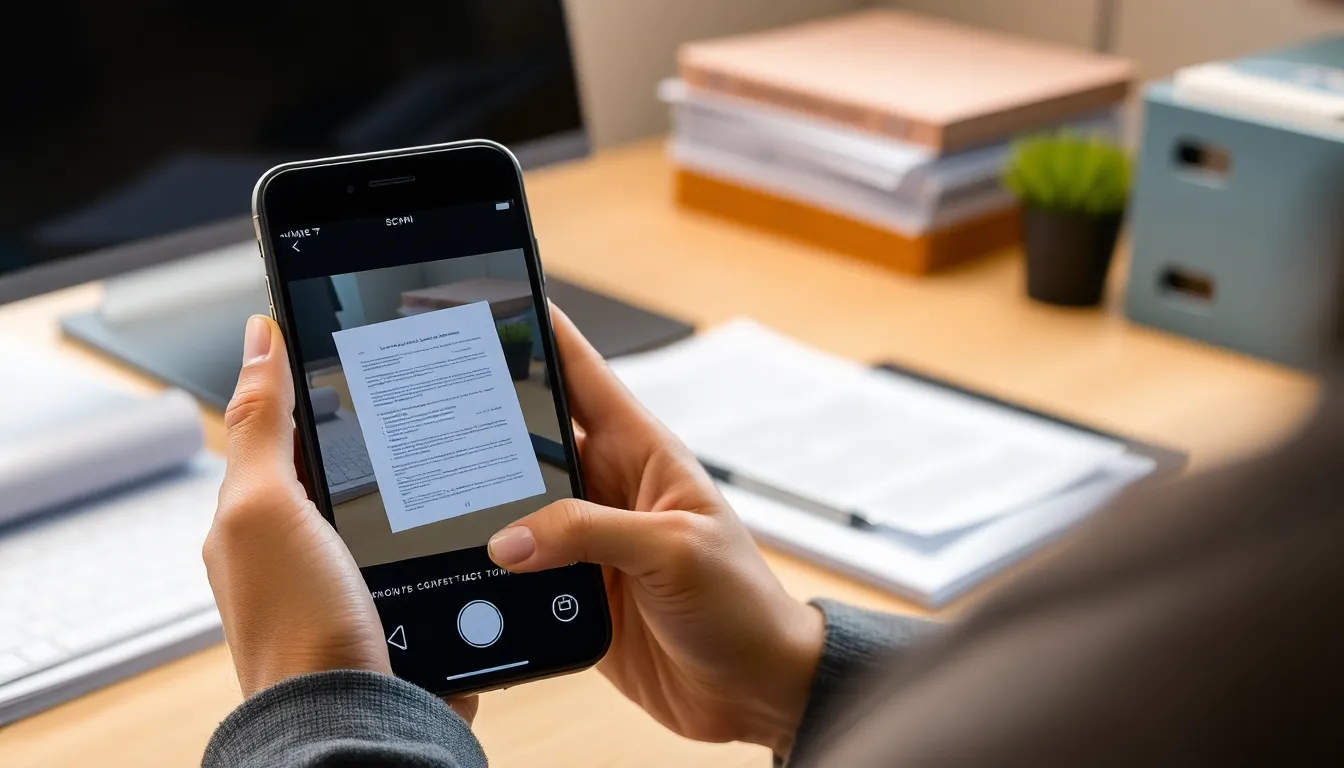
Scanning on an iPhone involves utilizing the built-in Notes app or third-party apps, providing various features for document management. Accessing the scanner within the Notes app is straightforward. Users open a new note, select the camera icon, and choose “Scan Documents.”
Utilizing this feature offers significant benefits. Scanned documents convert into high-quality PDFs, ensuring clarity and accuracy. Users can easily save these files to their device, share them via email, or upload them to cloud services like iCloud or Dropbox.
Third-party apps also enhance the scanning experience. Many apps, such as Adobe Scan or Scanner Pro, provide additional functionalities. Some include enhanced image editing, OCR (optical character recognition) capabilities, and the ability to batch scan multiple pages at once.
Editing scanned documents remains easy. After scanning, users can crop or rotate images, enhancing readability. Adding annotations or signatures becomes seamless with many apps.
For organization, renaming and tagging scanned files aids in quick retrieval. Users can categorize documents by type or date, maintaining an organized library of important files. This feature supports efficient document management.
Understanding the scanning process empowers users to manage their documents efficiently. Mastering these features streamlines workflows, reducing paper clutter and improving overall productivity. Users can quickly adapt to their scanning needs, leading to effective document handling.
Getting Started with the Scanner
Scanning documents on an iPhone is straightforward. Users can start by accessing apps optimized for this task, with the Notes app being a popular choice.
Accessing the Notes App
To begin scanning, locate the Notes app on the iPhone’s home screen. Tapping on the app opens a simple yet effective interface. Users can create a new note by hitting the pencil icon at the bottom right. Scanning options become available through the camera icon in the note. Clicking this icon reveals a menu, allowing access to the scanning feature. The Notes app supports direct saving of scanned files into notes, keeping everything organized in one place.
Finding the Scan Document Feature
Once in the new note, locating the scanning feature only takes a moment. Users should tap the camera icon, then select “Scan Documents” from the options provided. This action activates the camera, ready to scan. Automatic detection of the document edges simplifies the scanning process. For precise scanning, users can manually adjust the corners if needed. After capturing the scan, it can be saved as a PDF instantly, facilitating effortless organization and access.
Scanning Documents Step-by-Step
Scanning documents on an iPhone involves a few straightforward steps that can significantly enhance organization and accessibility. Follow these guides to ensure efficient scanning.
Positioning Your Document
Start by placing the document on a flat surface. Ensure there’s adequate lighting to improve visibility. Position the iPhone directly above the document for the best angle. Align the edges of the document with the screen to center it properly. This positioning minimizes distortion and enhances the quality of the scan.
Capturing the Scan
Tap the camera icon within the Notes app and select “Scan Documents.” The iPhone automatically detects the document edges, which simplifies the scanning process. For precision, users can adjust the corners if necessary. After positioning the document, press the shutter button to capture the scan. Multiple pages can be scanned consecutively by selecting “Add” after each scan, creating a cohesive PDF file.
Adjusting Scan Settings
Adjusting scan settings occurs after capturing a document. Users can choose between color, black and white, or grayscale options based on the content. Enhancing the scan can include cropping out excess edges or rotating the document for alignment. Each adjustment contributes to the final quality of the scanned file, ensuring clarity and professionalism.
Saving and Sharing Your Scanned Documents
Scanned documents need proper saving and sharing options. Users can choose where to save their scanned files, ensuring easy access later.
Saving to Files
To save a scanned document to Files, select the “Save to Files” option after scanning. Users can choose a specific folder to maintain organization. Options include iCloud Drive for accessibility across devices or local storage for privacy. Document names can be edited to enhance clarity. After saving, users can find the documents using the Files app’s search feature, which quickly retrieves files based on tags or names.
Sharing via Email or Messaging
Sharing scanned documents along email or messaging is straightforward. Users simply tap the share icon after scanning, selecting the desired method. For email, entering recipients’ addresses becomes quick with automatic integration from contacts. Images can be shared via iMessage or other messaging apps by selecting the app icon and sending documents directly. This flexibility allows fast communication, making collaboration seamless and efficient.
Troubleshooting Common Scanning Issues
Scanning issues can arise despite the simplicity of the process. Users may encounter problems such as unclear scans, failure to detect document edges, or difficulty saving files. These issues can often be resolved with a few quick fixes.
Unclear scans frequently occur due to poor lighting. Ensure that the document is well-lit and avoid shadows. Adjusting the position of the iPhone may also improve clarity during scanning. Moving closer to the document can help capture finer details.
Sometimes, the app might not automatically detect the document edges. In these cases, manually adjusting the corners ensures a precise scan. Tap on the edges to fit them perfectly around the document’s outline for better results.
Saving the scanned documents can pose problems if storage is limited. Check available space on the device. Users can free up space by deleting unnecessary files or transferring documents to cloud storage like iCloud Drive.
Issues with sharing scanned documents may arise as well. Users may not see the share icon. Restarting the app often resolves this problem, restoring functionality to share files via email, messaging, or other selected apps.
Multiple page scans can sometimes lead to formatting issues in the final PDF. Review the scanned pages closely after completion. Correct any misalignments by selecting the appropriate page and adjusting it before saving.
Updates to the iPhone’s software can significantly affect app performance. Keeping the device updated ensures all features work efficiently. Users can check for updates by navigating to Settings, selecting General, and tapping Software Update.
Scanning documents on an iPhone transforms the way users manage their paperwork. With just a few taps they can create high-quality digital files that are easy to organize and share. The versatility of the Notes app and third-party options provides users with various tools to enhance their scanning experience.
By mastering the scanning features available on their device individuals can significantly reduce paper clutter and streamline their workflows. Whether it’s for personal use or professional needs the ability to quickly scan and retrieve documents empowers users to stay organized and efficient. Embracing this technology not only simplifies document management but also enhances productivity in everyday tasks.